🚀 Deploying The Backend
We’ll deploy the app piece by piece, and at first we’ll deploy & configure things in a sub-optimal way. This is in order to explore the Kubernetes concepts and show their purpose. Then we’ll iterate and improve towards the final architecture.
We have three “microservices” we need to deploy, and due to dependencies between them we’ll start with the MongoDB database then the data API and then move onto the frontend.
From here we will be creating and editing files, so it’s worth creating a project folder locally (or even a git repo) in order to work from if you haven’t done so already.
🍃 Deploying MongoDB
We’ll apply configurations to Kubernetes using kubectl and YAML manifest files, and we’ll be doing this a lot throughout the workshop.
These files will describe the objects we want to create, modify and delete in the cluster.
If you want to take this workshop slowly and treat it as more of a hack, you can research and build the required YAML yourself, you can use the Kubernetes docs and the following hints:
- Deployment should be used with a single replica.
- The image to be run is
mongo:5.0. Note: This is not really part of our app, so we pull it from the public MongoDB image hosted on Dockerhub, not the ACR we set up. - The port 27017 should be exposed from the container.
- Do not worry about persistence or using a Service at this point.
- Pass
MONGO_INITDB_ROOT_USERNAMEandMONGO_INITDB_ROOT_PASSWORDenvironmental vars to the container setting the username to “admin” and password to “supersecret”.
Alternatively you can use the YAML below to paste into mongo-deployment.yaml, don’t worry this isn’t cheating, in the real world everyone is too busy to write Kubernetes manifests from scratch 😉
Click here for the MongoDB deployment YAML
kind: Deployment
apiVersion: apps/v1

metadata:
  name: mongodb

spec:
  replicas: 1
  selector:
    matchLabels:
      app: mongodb
  template:
    metadata:
      labels:
        app: mongodb
    spec:
      containers:
        - name: mongodb-container

          image: mongo:5.0
          imagePullPolicy: Always

          ports:
            - containerPort: 27017

          env:
            - name: MONGO_INITDB_ROOT_USERNAME
              value: admin
            - name: MONGO_INITDB_ROOT_PASSWORD
              value: supersecret
</br>
Then apply the manifest with:
kubectl apply -f mongo-deployment.yaml
If successful you will see deployment.apps/mongodb created, this will have created one Deployment and one Pod. You can check the status of your cluster with a few commands:
kubectl get deployment- List the deployments, you should see 1/1 in ready status.kubectl get pod- List the pods, you should see one prefixedmongodb-with a status of Running.kubectl describe deploy mongodb- Examine and get details of the deployment.kubectl describe pod {podname}- Examine the pod, you will need to get the name from theget podcommand.kubectl get all- List everything; all pods, deployments etc.
Get used to these commands you will use them a LOT when working with Kubernetes.
For the next part we’ll need the IP address of the pod that was just deployed, you can get this by running kubectl get pod -o wide or the command below:
kubectl describe pod --selector app=mongodb | grep ^IP:
🗃️ Deploying The Data API
Next we’ll deploy the first custom part of our app, the data API, and we’ll deploy it from an image hosted in our private registry.
- The image needs to be
{ACR_NAME}.azurecr.io/smilr/data-api:stablewhere{ACR_NAME}should be replaced in the YAML with your real value, i.e. the name of your ACR resource. - Set the number of replicas to 2.
- The port exposed from the container should be 4000.
- An environmental variable called
MONGO_CONNSTRshould be passed to the container, with the connection string to connect to the MongoDB, which will bemongodb://admin:supersecret@{MONGODB_POD_IP}where{MONGODB_POD_IP}should be replaced in the YAML with the pod IP address you just queried. - Label the pods with
app: data-api.
Again you can try building the Deployment yourself or use the provided YAML to create a data-api-deployment.yaml file
Click here for the DataAPI deployment YAML
kind: Deployment
apiVersion: apps/v1

metadata:
  name: data-api

spec:
  replicas: 2
  selector:
    matchLabels:
      app: data-api
  template:
    metadata:
      labels:
        app: data-api
    spec:
      containers:
        - name: data-api-container

          image: {ACR_NAME}.azurecr.io/smilr/data-api:stable
          imagePullPolicy: Always

          ports:
            - containerPort: 4000

          env:
            - name: MONGO_CONNSTR
              value: mongodb://admin:supersecret@{MONGODB_POD_IP}
</br>
💥 Notice: We have the password in plain text within the connection string! This clearly is a very bad practice, we will fix this at a later stage when we introduce Kubernetes Secrets.
Make the changes described above, remember to make the edits, you can not use this YAML as is, and then run:
kubectl apply -f data-api-deployment.yaml
Check the status as before with kubectl and it’s worth checking the logs with kubectl logs {podname} to see the output from the app as it starts up.
This time we’ve set the number of replicas to two, if you run kubectl get pods -o wide you will see which Nodes the Pods have been scheduled (assigned) to.
You should see each Pod has been scheduled to different Nodes, but this is not guaranteed. Pod scheduling and placement is a fairly complex topic, for now we can move on.
⏩ Accessing the Data API (The quick & dirty way)
Now it would be nice to access and call this API, to check it’s working. But the IP address of the Pods are private and only accessible from within the cluster. In the next section we’ll fix that, but for now there’s a short-cut we can use.
Kubernetes provides a way to “tunnel” network traffic into the cluster through the control plane,
this is done with the kubectl port-forward command.
Pick the name of either one of the two data-api Pods, and run:
kubectl port-forward {pod_name} 4000:4000
And then accessing the following URL http://localhost:4000/api/info either in your browser or with curl we should see a JSON response with some status and debug
information from the API.
curl http://localhost:4000/api/info | json_pp
Clearly this isn’t a good way to expose your apps long term, but can be extremely useful when debugging and triaging issues.
When done, cancel the port-forwarding with ctrl-c
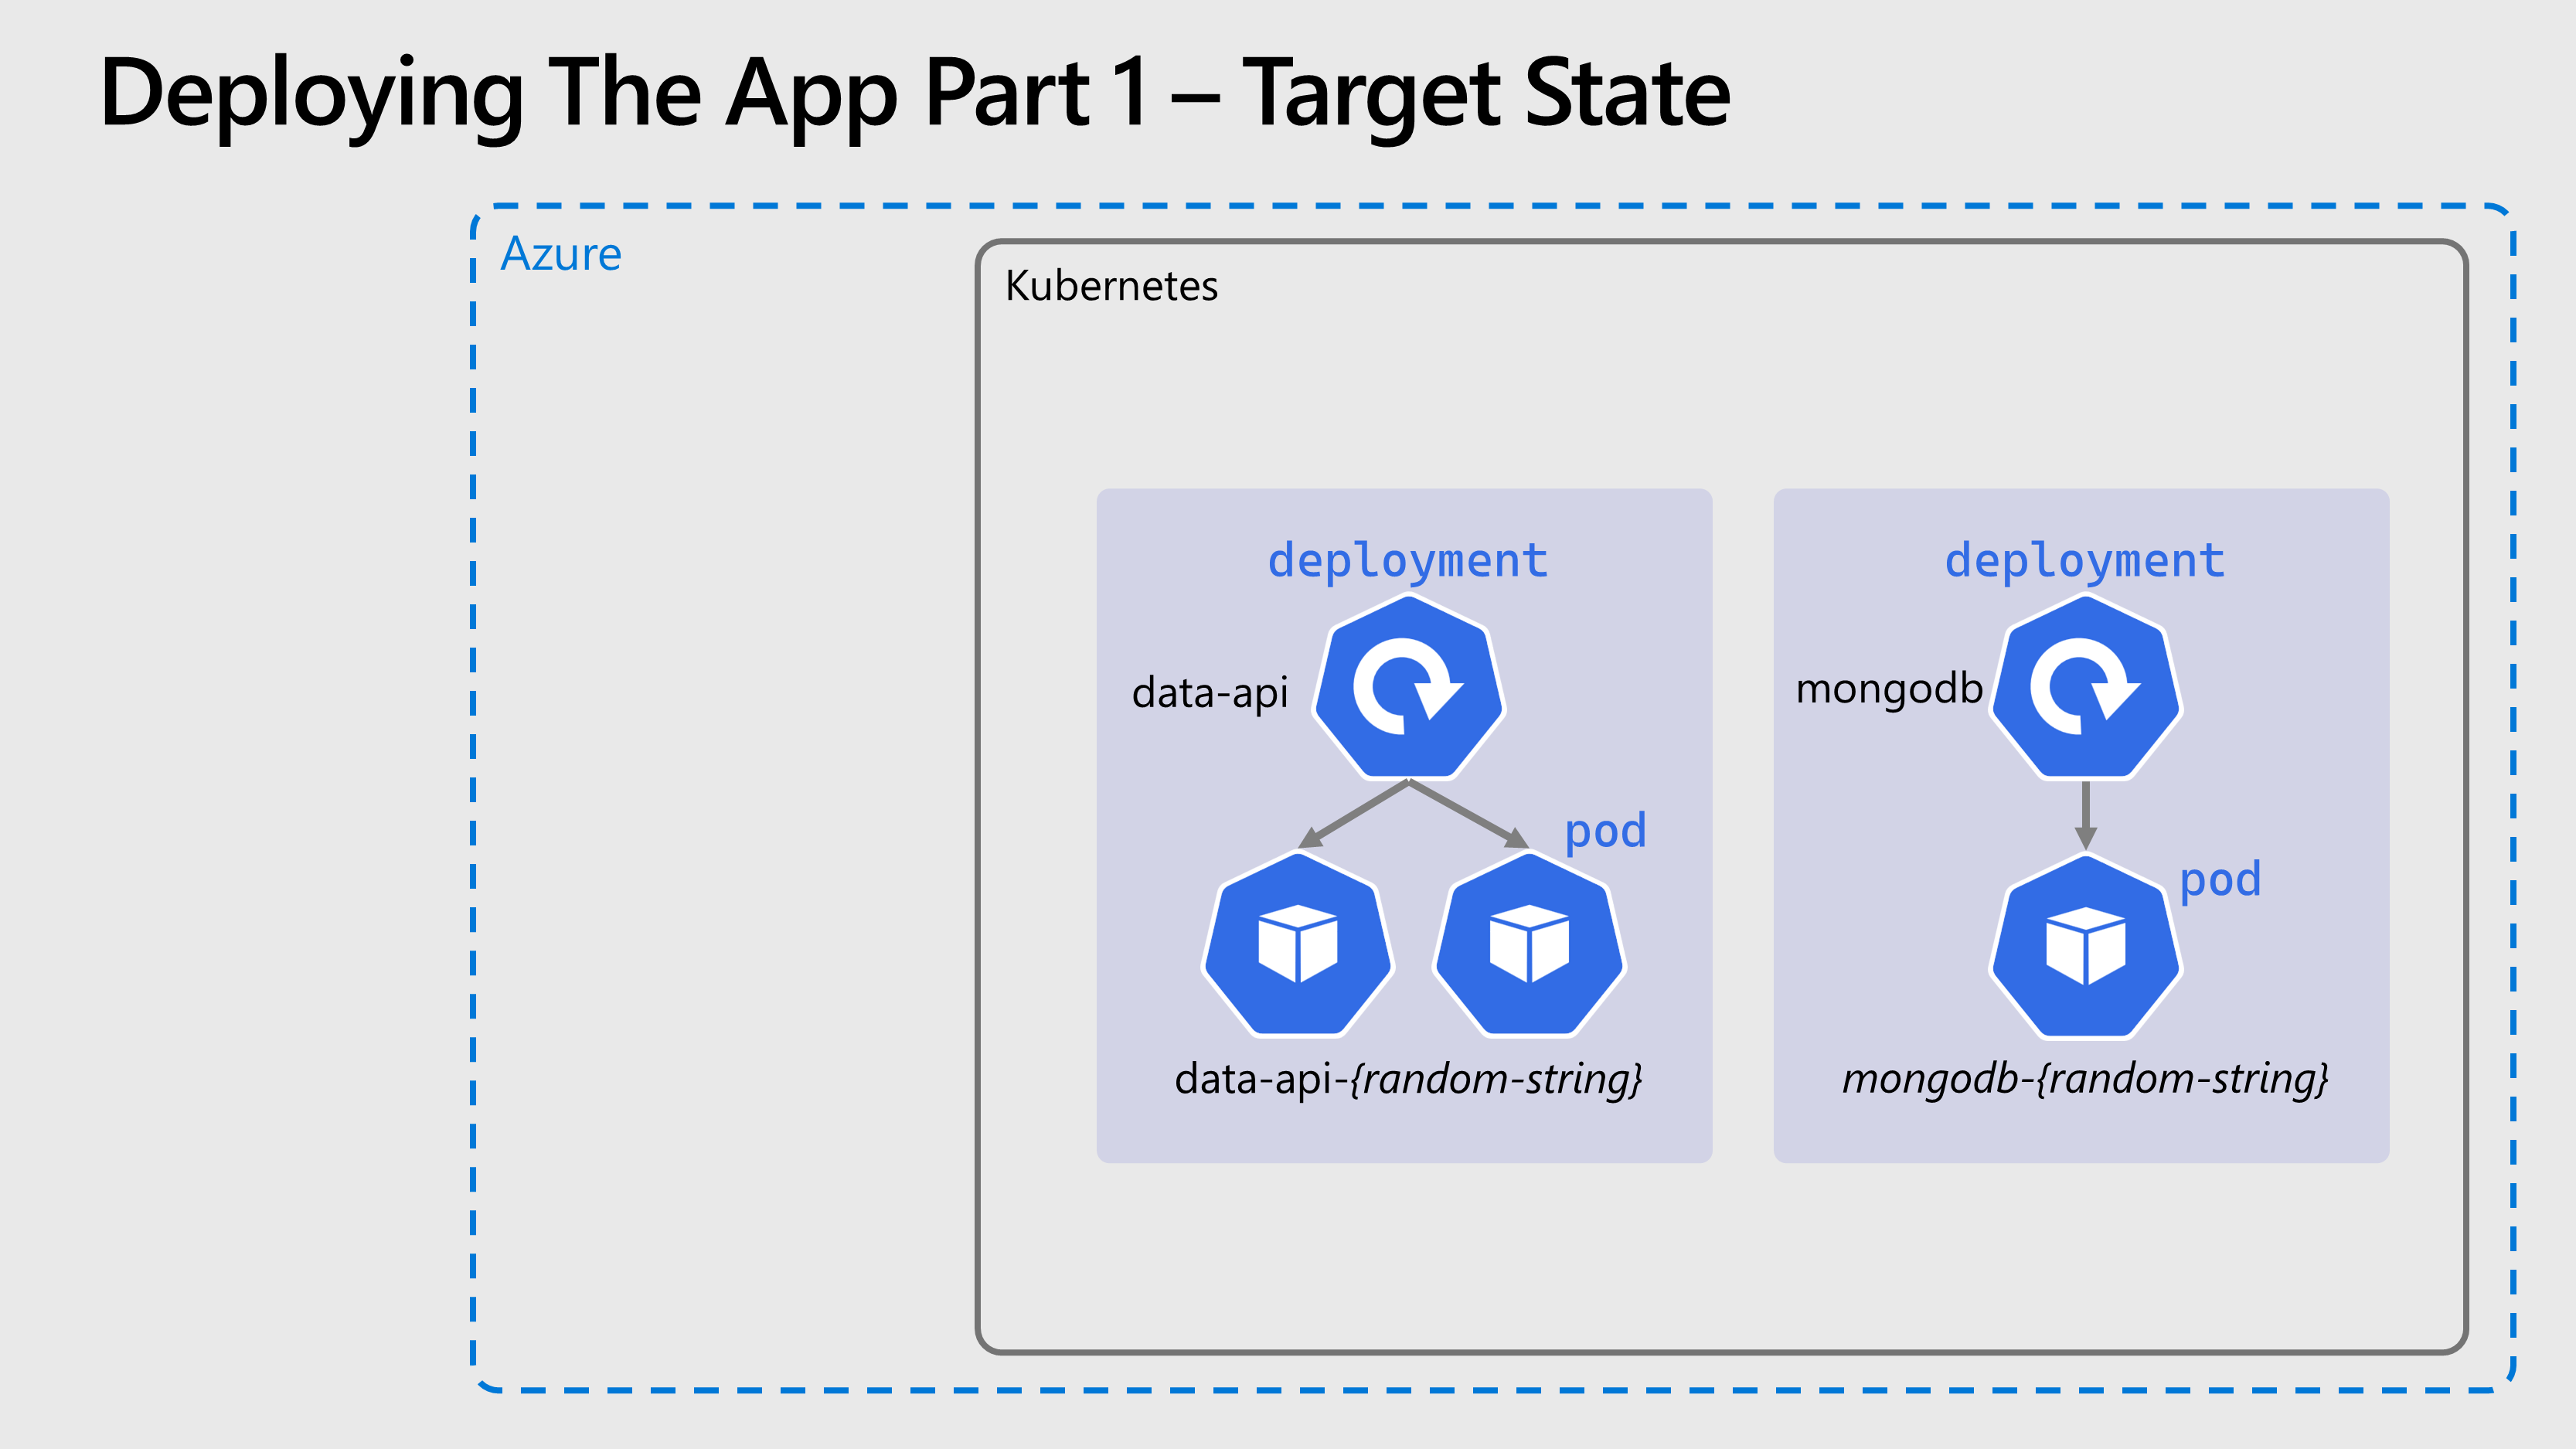
🖼️ Cluster & Architecture Diagram
The resources deployed into the cluster & in Azure at this stage can be visualized as follows:
Navigation
Return to Main Index 🏠 ‖ Previous Section ⏪ ‖ Next Section ⏩